
Recording professional-quality vocals at home is more achievable than ever—but one of the biggest challenges beginners face isn’t expensive gear, it’s the room itself. If you don’t control your environment, even the best microphone won’t save your recording. The good news is that with a few practical techniques, you can dramatically improve your vocal sound without spending a fortune.
Recording Environment
One of the first things you need to tackle is sound reflection. When you record vocals in a typical bedroom, your voice doesn’t just travel straight into the microphone—it also bounces off walls, ceilings, and hard surfaces. These reflections return to the mic milliseconds later, creating a hollow, echo-like effect often described as a “bathroom” sound. Once that ambient reflection is recorded, it’s almost impossible to remove cleanly in mixing.
This leads to a key principle in recording: you can always add ambience later, but you can’t take it away. Effects like reverb and delay are easy to apply during mixing, giving you full control over how "wet" or spacious your vocals sound. But unwanted room noise and reflections? Those are baked into the recording forever. That's why capturing a clean, dry vocal is essential from the start.
DIY Vocal Recording
When you're just beginning and don't yet have a professionally treated room, there are simple DIY solutions that work surprisingly well. One highly effective method is creating a temporary vocal booth using everyday household items. For example, you can place a step ladder on either side of your microphone stand and drape a thick blanket or duvet over the top, forming a tent-like structure around the mic and vocalist.
This setup helps absorb reflections before they hit the walls and bounce back. Instead of your voice reflecting around the room, the soft materials capture and dampen those sound waves, resulting in a much cleaner recording. It's not glamorous, but it works—and many producers have used similar setups early in their careers. The difference in vocal clarity can be immediate and dramatic.
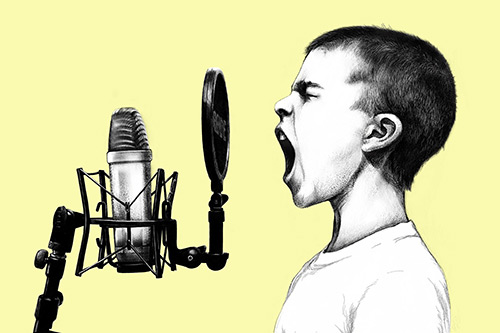
Positioning Matters for Vocal Microphones
Try to avoid recording directly in the center of a room or too close to bare walls. Even with your DIY setup, placing yourself in a quieter, less reflective part of the room can help. Soft furnishings like carpets, curtains, and sofas can also contribute to reducing unwanted reflections.
Beyond the room itself, your recording chain plays a huge role in vocal quality. One of the most important components is the preamp. A preamp boosts your microphone's signal to a usable level, and a good one can add warmth, clarity, and presence to your vocals. There are many options on the market, ranging from budget-friendly to high-end professional units.
Recording on a Budget
If you're just starting out, there's no need to spend thousands. Solid entry-level and mid-range preamps can deliver excellent results. Some well-regarded options include the Heritage Audio Baby RAM, the PreSonus Studio Channel, and the Midas XL4-2. Each of these offers a different character and feature set, so it's worth researching which one best suits your style and setup.
What Microphone is Best
Equally important is your choice of microphone. A decent condenser microphone is typically the go-to for vocal recording due to its sensitivity and detail. Prices can vary widely—from around £150 to several thousand—but you don't need to break the bank to get started. There are plenty of affordable options that deliver impressive clarity for home recording.
The key is to find a microphone within your budget that complements your voice. Every voice is different, and some mics will suit you better than others. Take time to read reviews, listen to comparisons, and if possible, test a few options. Remember, you can always upgrade later or part-exchange your gear as your budget grows and your needs evolve.
Home Recording or Pro Studio
In the end, great vocals come down to a combination of environment, technique, and equipment. By controlling reflections, capturing a clean signal, and choosing the right tools for your setup, you can achieve recordings that sound polished and professional—even from your bedroom.
Start simple, focus on the basics, and build from there. With the right approach, your home recordings can compete with much more expensive studio setups.